A Simple Calculator


Problem 1
Design a calculator to add two numbers as shown in the figure. If you are using Microsoft Visual Studio 2017 use the steps below. If you are using Microsoft Visual Studio, the New project dialog opens when you open Microsoft Visual Studio.
Diseñe una calculadora para sumar dos números como se muestra en la figura. Si usted está usando Microsoft Visual Studio use los pasos mostrados debajo. Si usted está usando Microsoft Visual Studio, el diálogo de Nuevo Proyecto se abre cuando se abre Microsoft Visual Studio.

gui

NewProject

NewProject2019

DialogApplication2019

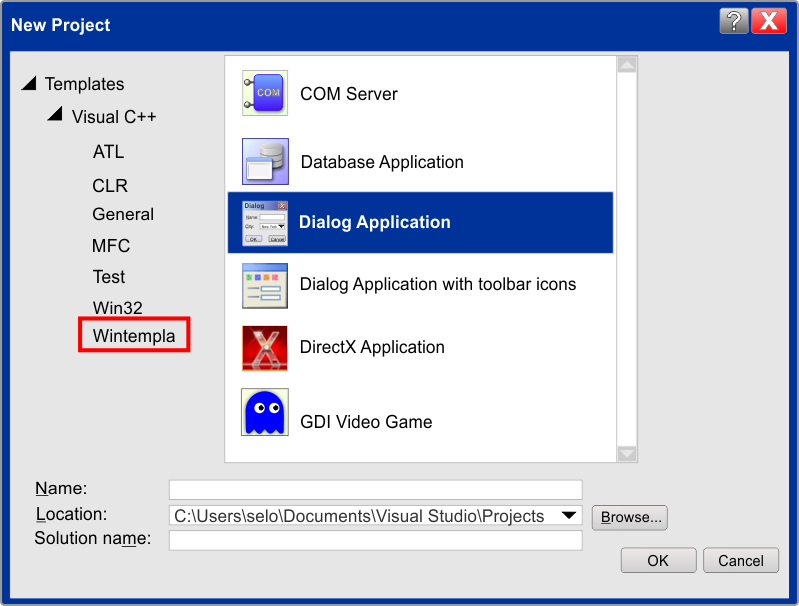
Step 1. Create the proyect in Microsoft Visual Studio 2017.
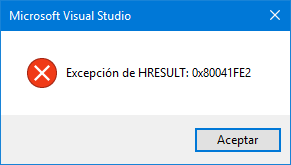
  1. Open Microsoft Visual Studio
  2. Select on the menu: File > New > Project ... 
  3. Project types: Visual C++ > Wintempla   Dialog Application
  4. Name: Calculator
  5. Location: Provide a suitable location for your project
  6. Press the OK button. If your get an error at this point, please read the next definition.

  1. Abra Microsoft Visual Studio
  2. Desde el menú seleccione File > New > Project ... 
  3. Tipos de Proyectos: Visual C++ > Wintempla   Dialog Application
  4. Name: Calculator
  5. Location: proporcione una ubicación conveniente para su proyecto
  6. Presione el botón de OK. Si usted tiene un error en este punto, por favor lea la siguiente definición.

HRESULT: 0x80041FE2

If you get "Exception HRESULT: 0x80041FE2" when creating a Wintempla project, it means that Visual C++ is not installed. You need to modify your Microsoft Visual Studio installation to add Visual C++. Use the Control Panel > Programs and Characteristics > Select Microsoft Visual Studio and change the installation to add the Language Visual C++.
Si usted obtiene "Exception HRESULT: 0x80041FE2" al crear un proyecto de Wintempla, esto quiere decir que Visual C++ no está instalado. Usted necesita modificar la instalación de Microsoft Visual Studio para agregar Visual C++. Use el Panel de Control > Programas y sus Caracteristicas > Seleccione Microsoft Visual Studio y modifique la instalación para agregar el Lenguaje Visual C++.

ExceptionHRESULT0x80041FE2

Step 2. Edit the Graphic User Interface (GUI).
  1. On the menu: Tools > Wintempla
  2. Once Wintempla is open, draw one button. Set the "Name" to btCalculate and the "Text" to Calculate
  3. Draw a textbox. Set the "Name" to tbxX
  4. Draw another textbox. Set the "Name" to tbxY
  5. Draw a third textbox. Set the "Name" to tbxResult
  6. Draw a label. Set the "Text" to +
  7. Draw a second label. Set the "Text" to =
  8. Press the OK button
Note for Wintempla 2012 and earlier: if Wintempla does not appear under the Tools menu:
  1. In the menu select: Tools > Customize...
  2. In Commands Tab: click the Add Command button
  3. In the categories: select AddIns (Complementos). Wintempla must appear in the list, if it does not, it means that the installation failed. Select Wintempla and press the OK button
  4. Press the Move Down button to move Wintempla to the right in the top toolbar of Microsoft Visual Studio. Press the Close button to close the dialog

  1. En el menú: Herramientas > Wintempla
  2. Una vez que Wintempla este abierto, dibuje un botón. Fije el nombre "Name" a btCalculate y el "Text" a Calculate
  3. Dibuje una caja de texto. Fije el "Name" a tbxX
  4. Dibuje otra caja de texto. Fije el "Name" a tbxY
  5. Dibuje una tercera caja de texto. Fije el "Name" a tbxResult
  6. Dibuje una etiqueta. Fije el "Text" a +
  7. Dibuje una segunda etiqueta. Fije el "Text" a =
  8. Presione el botón de OK
Nota para la versión 2012 de Wintempla y anterior: Si Wintempla no aparece en el menú de Herramientas:
  1. En el menú selecciones: Herramientas > Personalizar...
  2. En la pestaña de Comandos: Haga clic en el botón de Add
  3. En las categorías: seleccione AddIns (Complementos). Wintempla debe aparecer en la lista, si no está, esto significa que hubo un error durante la instalación. Seleccione Wintempla y presione el botón de OK
  4. Presione el botón de Move Down para mover Wintempla a la derecha en la barra de herramientas de Microsoft Visual Studio. Presione el botón de Close para cerrar el diálogo

WintemplaEditor

Step 3. Write the code.
  1. Open Solution Explorer, if it is not already open. On the menu: View > Solution Explorer
  2. Open the Calculator.cpp file. You can do this by double click on files shown on the Solution Explorer view
  3. Edit this file by adding the code inside the function: btCalculate_Click(Win::Event& e)

Escriba el código.
  1. Abra Solution Explorer, si esta no está ya abierto. En el menú: View > Solution Explorer
  2. Abra el archivo Calculator.cpp. Usted puede hacer esto haciendo doble clic en el archivo que se muestra en la vista de Solution Explorer
  3. Edite este archivo agregando el código dentro de la función: btCalculate_Click(Win::Event& e)

Calculator.cpp
#include "stdafx.h" //________________________________________ Calculator.cpp
#include "Calculator.h"

int APIENTRY wWinMain(HINSTANCE hInstance, HINSTANCE , LPTSTR cmdLine, int cmdShow){
     Calculator app;
     return app.BeginDialog(IDI_Calculator, hInstance);
}

void Calculator::Window_Open(Win::Event& e)
{
}

void Calculator::btCalculate_Click(Win::Event& e)
{
     const double x = tbxX.DoubleValue;
     const double y = tbxY.DoubleValue;
     const double result = x+y;
     tbxResult.DoubleValue = result;
}

Step 4. Run the program.
On the menu: Debug > Start Debugging
Corra el programa. En el menú: Debug > Start Debugging

Calculator

Microsoft Visual Studio assistance

While typing Microsoft Visual Studio provides suggestions to reduce the typing; you can press Enter at any moment to accept the suggestion. The figure below shows some of the symbols used for Microsoft Visual Studio.
Mientras se escribe Microsoft Visual Studio proporciona sugerencias para reducir lo que el usuario escribe; usted puede presionar Enter en cualquier momento para aceptar la sugerencia. La figura de abajo muestra algunos de los símbolos usados por Microsoft Visual Studio.

VisualNotation

Microsoft Windows XP

For a program created in Microsoft Visual Studio can run in Microsoft Windows XP, you need to:
  1. Select the project in Solution Explorer
  2. Use the context menu to open the Project Properties
  3. Expand: Configuration Properties
  4. Select: General
  5. Platform Toolset: Visual Studio 201X - Windows XP

Para que un programa creado en Microsoft Visual Studio pueda correr en Microsoft Windows XP, usted necesita:
  1. Selecciona el proyecto en Solution Explorer
  2. Use el menú de contexto para abrir las Propiedades del Proyecto
  3. Expanda: Configuration Properties
  4. Seleccione: General
  5. Platform Toolset: Visual Studio 201X - Windows XP

© Copyright 2000-2021 Wintempla selo. All Rights Reserved. Jul 22 2021. Home